Sunday, May 4, 2014

Crepes with hazelnut cream and fresh strawberries


Número dos recipe of the day! Or should I say numéro deux if we're sticking with the French theme. These are the delicious crepes that I made for breakfast this morning. The pancake batter cooks instantly making crepes a very quick and easy breakfast. I healthified (gasp) these a little bit because I am not a big fan of flour all that much... anddd because I accidently bought the wrong kind of almond flour for the macarons, so I needed to use it up. Needless to say, they turned out exactly the way crepes are supposed to. Now. The star of this version of crepes is the filling. I like nutella, I like chocolate, and I definitely like it for breakfast. Saying that, a little bit of chocolate goes a long way. If you like your nutella pure in your pancakes, go ahead and skip this step. But trust me, you still might wanna try it. The secret for the hazelnut cream? Greek yogurt! Yes! Another healthy ingredient! I would have used whipped cream, but hey, a girls gotta have some limits. Some may say 'But Greek yogurt is like sour cream!' Trust me, I had my doubts. But nope! The result was a fluffy, creamy, hazelnutty, heaven of a filling. If that's not convincing enough, I don't know how to convert the nutella purists. Anyways, get your nutella, grab a sauce pan, and lets make some crepes.


Do not forget the strawberry rose garnish!


Crepe Recipe (Adapted from Allrecipes)
Makes 5 large crepes

1/4 cup almond flour
1/4 cup all purpose flour
1 egg
1/4 cup milk
1/4 cup water
dash of vanilla
1 tbsp melted butter.

Filling by Kala-Dawn Larsen
2 sliced strawberries
2 tbsp nutella (or homemade nutella in my case)
2-3 tbsp plain Greek yogurt

Now I did not follow the directions to make the batter whatsoever, but I have a much easier method.

Throw it all in a blender and blend it up! Seriously! I just put it in my magic bullet, whirled it around a bit, and voila! Delicious crepe batter. Place it in the fridge while you prepare the strawberries and cream.

Slice the strawberries thinly, and if you want, make a rose for garnish (Video tutorial here).
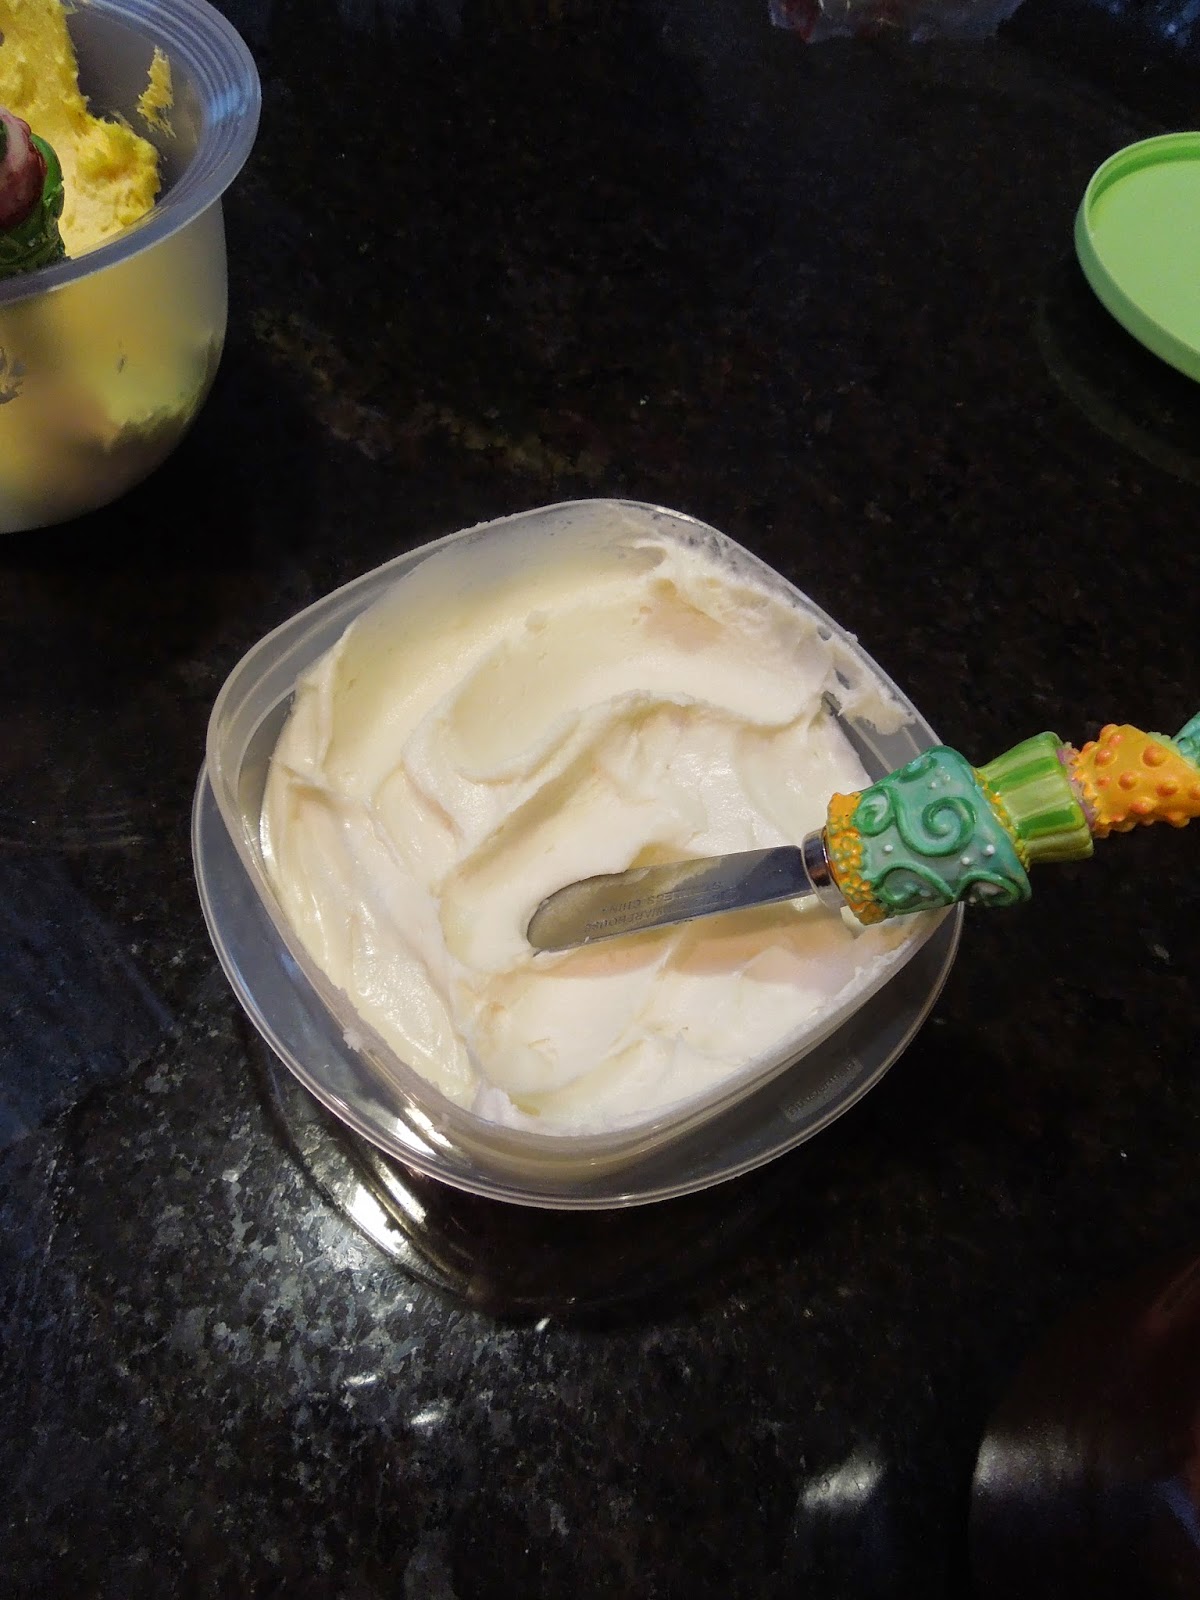
Stir together the nutella and greek yogurt until it is all one consistency. Set aside.

Preheat a non stick pan over medium high heat. Once hot, add a small amount of butter. Add 1/4 cup of crepe batter, and swirl around quickly to make a large circle. If they look ugly, they will still taste delicious. All pancakes are created equally, we don't judge. Place cooked crepe on a plate and cover with a saucepan lid until the remaining ones are made. 

TIME TO ASSEMBLE. Take your crepe, and spread the hazelnut cream on half of it. Fold the other side over, so you are looking at half a crepe now. In one quatre, place some sliced strawberries. Fold over the remaining quarter. Math guys. Fractions. I know I'm sorry. 100% delicious, just remember that. 

Place on a plate/or platter, and repeat with remaining crepes. Drizzle with chocolate sauce if desired

Shovel into your mouth and enjoy nutella crepe pancake heaven. You're welcome.

Time for less than beautiful pictures!
Almond Flour makes pretty crepes

1/2


1/4


Now you know how to make hazelnut cream crepes! Enjoy!

I'm back!!... with French Macarons!

Hello Blogging World!! It has been almost 2 years since I last posted on here, and I miss it terribly! It's so much fun finding new recipes, making them, and being able to share them with you! Without further ado, lets get started on our first recipe; French Macarons!


These delicacies melt in your mouth, and taste like cotton candy clouds. Although finicky to make, when you see the little 'feet' appearing in the oven, you know you have made them right! Almond flour, egg whites, and sugar are the 3 main ingredients in these cookies. Cookies? or Mini Cakes? They do have a filling! What do you think? Anyways! The process to making Macarons is very similar to a meringue. Whipped egg whites that are stabilized with cream of tartar and sugar are then carefully folded together with almond flour and powdered sugar. In addition to, in my case, pink food colouring. Because who doesn't like a cookie that tastes good AND looks good? Plus, I quite fancy pink things. Once the cookies have been baked they are filled with whichever filling you prefer! I had an assortment of choices. Homemade hazelnut spread (aka nutella) made by my lovely friend Rowan who helped me make the cookies, Vanilla buttercream, and cream cheese icing. These were all quite rich, so next time I may try just a jam. But hey, there is nothing wrong with richness either!


After travelling to New York City almost 2 years ago and trying them at the Bouchon Bakery (Vanilla bean, and Raspberry; I still remember) I have always wanted to bake them, and I had the perfect opportunity to attempt them! My French course requires a Cultural Connections project, and I knew I wanted to do something related to food. (I <3 food). After watching 'Julie and Julia', a movie about a budding writer trying to get her name into the writing world, she began writing on a food blog. Inspired by the famous French cook, Julia Child, she set off on a journey to make every single recipe in her cookbook. That was 500 recipes in 365 days. Quite extraordinary! I was then inspired by the movie to do something similar. I love to bake, and why not tie that into my project? Here is the plan. I am making a French dessert and pastry each week until the end of May. (I was planning on going to the end of June, but I discovered I have to be finished my course by May). That means 8 delicious, European inspired treats to blog about! I also plan on not stopping at the end of May with my blog. As an admitted Pinterest addict, I have so many recipes I want to try, and share what they're like. So I won't be disappearing any time soon!

Back to the recipe! I had to take all of these pictures quite quickly, and it being at night means nasty quality photos. So sorry! I also didn't use my fancy camera, so that didn't help much. In the future I will be practicing my food shots more carefully :)
Also, I don't know if I will include step-by-step photos for every recipe, but for the project ones I am.

For a more detailed process on how to make them, I highly suggest visiting the Joy of Baking recipe link. Making meringues for the first time can be challenging!

French Macarons (Joy of Baking Recipe)

100 grams ground blanched almonds or almond meal/flour
180 grams confectioner (powdered or icing) sugar
100 grams "aged" egg whites, at room temperature
1/4 teaspoon cream of tartar (optional)
35 grams superfine or castor white sugar

Prepare 3 baking sheets with parchment paper. Place a plain piping tip into a pastry bag.

Sift together the powdered sugar and almond flour 3 times into a medium bowl. It is VERY important to sift until it is very, very light.

In the bowl of an electric mixer, whip the egg whites with the whisk attachment on medium/high speed until soft peaks form.
Add cream of tartar and whisk to incorporate. Gradually add white sugar until stiff peaks form. When removing the whisk, the egg whites should stand straight up, but still be shiny. Add food colouring if using.

Carefully, fold 1/3 of the almond/powdered sugar mixture into the egg whites. Repeat with another 1/3, and finally with the last 1/3. Be very gentle, and careful to incorporate the ingredients completely together.

Spoon into the prepared piping bag, and pipe circles about 2 inches in diameter (or smaller) onto the prepared baking sheet. They can't be right next to each other, but they don't spread, so they can have about 1 inch between each other.

Bang the baking sheet on the counter 4-5 times to remove air bubbles. Let them sit for 30 minutes, uncovered.

Preheat oven 325 degrees, and bake for 14-16 minutes, rotating halfway through. They are done when the little 'feet' have grown, and are slightly brown on top.

Cool completely, then carefully pull off the parchment paper.

Fill with whatever you please, sandwich together, and prepare to experience macaron euphoria!!!

Have fun!!!

Sifting together the almond flour and confectioners sugar

Perfectly whipped egg whites and sugar.

Rowan piping some Macarons

Lots of cookies!

The assembly line

Homemade hazelnut spread

Homemade cream cheese icing

Homemade vanilla buttercream

(such bad lighting!) our little baked meringues

The final product!

Saturday, December 15, 2012

Candy Cane White Chocolate Cheesecake

Well, Hello!!! I thought everyone would love this recipe for the holidays. It's a keeper! Because what is more festive than the flavour of candycane? Okay, maybe eggnog, BUT I will try that in a cheesecake sometime soon aswell! For now, this one has no problem being my Christmas favorite.


Now I guess you are wondering why I love this cheesecake so much? To me it's because this is my VERY OWN RECIPE! Yes! I finally put on my own thinking cap, stepped away from the internet, and came up with this! I am so proud of myself :') I made some sugar cookies, crushed them in the food processor, and baked them into a crust. Next I beat up cream cheese until ultra smooth, threw in some candy canes, and baked it away. Voila! Ooo I forgot to mention there is a layer of white chocolate in the middle of the cheesecake. I hope you enjoy it!

Candy Cane Cheesecake
Recipe By Kala-Dawn's Kreations

Crust:
1 1/4 cup of sugar cookies that have been ground in a food processor
2-4 tbsp of butter, melted

Mix the crumbs and melted butter until moistened. Pat into bottom of a 9 inch springform pan, and bake at 350F for 10 minutes. Cool completely.

Filling:
3, 250 gr packages of cream cheese, room temperature
3/4 cup granulated sugar
1 tsp pure vanilla extract
1/2 tsp salt
3 eggs
1/3 cup crushed candy canes
1/2 cup white chocolate chips

Preheat oven 325F. Wrap foil around springform pan. (This is for a waterbath the cheesecake goes in, and so the crust doesn't get soggy)
Beat cream cheese until completely smooth. No lumps! Scrape down the sides often. Add sugar, and mix until combined. Mix in vanilla extract and salt. On low speed, add the eggs one at a time; just beating until it disappears. Be careful not to over beat in this step, or the cheesecake may crack while baking. Next, fold in candy canes. Pour half of the batter into the prepared pan. Sprinkle with white chocolate chips. Pour remaining batter on top. Jiggle pan to remove any airbubbles.
Place a pan of water on the bottom rack of your oven. On the middle rack, place cheesecake. (baking above the pan prevents soggy crusts, and it still keeps the oven moist).
Bake 50-55 minutes. Until slightly jiggly in middle. Do not overbake.
Cool 1 hour on wire rack to room temperature, and transfer to refrigerator until firm. I always cool mine overnight, and to let the flavors develope.

To make the white chocolate decorations, melt 2 ounces of white chocolate over a double boiler, and pipe onto a piece of wax paper in random swirly clusters. Sprinkle with crushed candy canes.

Top cooled cheesecake with fresh whipped cream and chocolate decorations :)

Enjoy!

Tuesday, June 26, 2012

Lemon Cheesecake with Fresh Blueberries

A short, and sweet entry today! This was made for a June Birthday, and I knew it had to be something that can also celebrate summer. What is better than fresh fruit? Although I had to buy these berries from the grocery store I cannot wait for the ones in my garden to ripen! We have so many, and I'm very happy about that. Last year we barely had any! It was very odd! Anyways! This cheesecake is incredibly rich, smooth, and zesty. The white chocolate ganache and whipped cream adds a whole new dimension as well. Feel free to swap blueberries for any other fruit if desired. Strawberries are perfect for Canada Day, but I would swap the lemon zest for orange.

Lemon Cheesecake with Blueberries
serves at least 12

1 cup crushed Dad's cookies or graham crackers
1/2 cup sliced almonds, crushed
1/4 cup melted butter.

Mix together the crumbs, crushed almonds and butter. Spread into a 9 inch springform pan. Bake for 10 minutes at 325 degrees F. Cool to room temperature.

24 ounces cream cheese, soft to room temperature
3/4 cup sugar
1/2 cup sour cream *optional, but I find it makes it smoother
1 1/2 tsp pure vanilla extract
3 eggs
zest of one lemon

Decrease oven temperature to 325 degrees F

Wrap tinfoil around the springform pan, coming 2 inches up the sides. Place in a larger pan with high sides. I use a jelly roll pan.

In a large bowl beat the cream cheese until smooth. Scrape down sides of bowl. Add the sugar and beat on medium-low speed for 5 minutes! Yes this may seem odd, but it dissolves the sugar and makes the filling incredibly smooth. Scrape down sides of bowl. Mix in the sour cream and vanilla extract. Scrape down sides of bowl (after every addition). Add the eggs 1 at a time, beating on low speed until just combined. Do not over mix! Scrape down one last time, and add lemon zest.

Pour the mixture into the pan, and smooth out the tops completely. By doing so it won't crack as much if you were to skip this step. Place the pan in the oven and pour in enough water to come up a little bit of the sides of the cheesecake. Bake for 50-60 minutes.

Cool completely to room temperature, then refrigerate over night.

For decorating I melted white chocolate, and spread it across the top of the cake using an offset spatula.

Whip 1 cup whipping cream with a couple tbsp of powdered sugar, and pipe rosettes across the top of the cake in a circle. Pipe tiny stars in the middle, and fill with blueberries. Garnish the rosettes with berries and a little shredded coconut if desired!

Thanks for reading! Happy Summer!


Thursday, June 21, 2012

No-Churn Raspberry Cheesecake Icecream Cupcakes


It is the second day of summer! How amazing is that! It feels wonderful to have sunshine, and warm weather. To celebrate I wanted to make one of my most favorite desserts, or snacks. Ice-cream! I have tried making it before in a ice-cream maker. You know the ones with the handles that you have to crank until your arm practically falls off? Well yeah, after that I wasn't too eager to make it again. Lets just say that ice-cream was only good enough to go into milkshakes drenched with chocolate syrup... Anyways! I first saw this recipe back in December. That isn't exactly ice-cream season, so I didn't make it. But I never forgot about it! Recently I made some coconut macaroons that only required a little bit of sweetened condensed milk, so I had some leftover. That was not going to waste! At 4.25 it had to get me another recipe! So I went out, and bought some whipping cream, mixed it all together, and voila! Deliciousness.

These colours are even perfect for Canada Day :)

No-Churn Raspberry Cheesecake Icecream Cups.
Makes 6, easily doubled to make 12.

Line 6 cups in muffin tray with LARGE liners.

100 grams cream cheese (cold!) - 1/2 a block
7 ounces sweetened condensed milk
1 tsp pure vanilla extract
1 cup whipping cream
ripe raspberries
white belgium chocolate chips

In your stand mixer with the paddle attachment, beat the cream cheese until completely smooth. Scrape down the sides. Slowly add the sweetened condensed milk while on medium speed. Scrape down the sides. Add the vanilla extract and whipping cream. Switch to the WHISK attachment and whip until medium stiff pikes form. The mixture shouldn't slide away when lifted. Fold in some belgium chocolate chips. (As many as you desire!) I did about 1/3 cup.

Using an icecream scoop (1/4 cup) place 1 scoop of the mixture in each cup.
Mush the raspberries and spread across the top. I did one raspberry per cup. Swirl with a toothpick. Add another scoop of batter ontop of that. Repeat with raspberries. Freeze at least 6 hours! It may be a good idea to let them thaw slightly before eating :)

ENJOY!!!! and happy summer!


Adapted From: Kitchen Simplicity

Saturday, June 2, 2012

Banana Muffins! First taste of summer

What a lovely day! The weather was a little bi-polar, but that's to be expected of spring. Okay, maybe not June. Usually by now I can wear shorts to school; not jeans and sweaters like last week... Anyways! I don't really mind a little sprinkle now and then.
To celebrate Spring I wanted to bake something nice and fresh. Although I made my Strawberry Rhubarb Pie last week, it was time for something a little more convenient, something that could be eaten on the go.... A MUFFIN! Just to my luck we had some lovely ripe bananas sitting in our fruit dish. I used my grandma's banana bread recipe, folded in some chocolate chips for my brother, and baked them in muffin tins. They are soft, with a full banana-y taste.
Banana-y? Yes that is a word...
They are one of my favorites! They are made in the same bowl with just a few ingredients. No spices, extracts in this recipe. Just bold banana flavor.

I included some pictures of flowers that are growing in our garden right now :)

Banana Muffins
18 muffins

1/2 cup margarine
1 cup sugar
2 eggs
2 cups flour
1 tsp baking powder
1 tsp baking soda
3 bananas, ripe
chocolate chips (optional)

Pre-heat oven 375 degrees. Line muffin tins with paper liners or grease lightly.

In a large bowl beat the margarine until smooth. Add the sugar and beat until fully mixed. Add both the eggs and beat until incorperated. Add the flour, baking soda and baking powder. Mix until just combined. Add the bananas and beat until batter is smooth. It's okay to have a couple banana chunks. Easy as that!

Using a muffin scoop (1/4 cup) fill 12 muffin sections. Stir some chocolate chips into the remaining batter if desired. Bake in the middle of the oven for 15 minutes or until a toothpick comes out clean.

Cool on racks for a couple minutes, then transfer to wire racks to cool completely.
Enjoy!!! Smartie cookie icecream sandwiches tomorrow...


Monday, May 21, 2012

I'm back!...Strawberry Rhubarb Pie


Hello!!! I can't believe I haven't posted on my blog in 6 months...!!! I began to get so busy that I would be baking 2 or 3 times a week and that would just be too much to blog about. Around Christmas things got especially crazy around here. I did 3 family's baking which came out to over 100 shortbread cookies, 5 white chocolate peppermint cheesecakes, Nanaimo bars, date squares, DOZENS of butter tarts and plenty more! Lets just say between that and school I had very little time to even think about blogging! Not to worry though because now that school is starting to slow down I will have more time on my hands.

Some more news... I got a real job! Next weekend I start working at one of our grocery stores in the bakery department! I am hired for the summer as a cake decorator! How exciting is that? I cannot wait to start! It will be quite different than working from home. Now that doesn't mean I will stop baking here! My dad wouldn't allow that ;) Neither would the bank ladies! Unfortunately for them I won't be doing coffee goodies every week, only a birthday cake each month. That is alright though because they are on diets! Although... I think I'm making them some coconut cupcakes in the next couple weeks...

OH! Guess what? I just got back from my band trip to New York City! What an experience! I will never forget it. There will be a post all about it tomorrow because right now I would like to get back to the Strawberry Rhubarb Pie!


I've been watching my rhubarb grow every single day, each day wanting to go pick it and create something. Somehow I have worked up enough patience to leave it alone and let it grow. Now it has gotten tall enough to make exactly what I've been waiting for... PIE! The last time I had pie was last summer when I made that delicious peach pie. Since then I haven't made another. Mainly because I associate pie mostly with the warm months. So now that my garden is producing it's own ingredients that means its time for seasonal desserts! And of course pie is best with the freshest fruits. Tart rhubarb with sweet strawberries and vibrant orange zest provide plenty of flavour that all get baked inside a flaky crust. Topped with a scoop of vanilla ice-cream or freshly whipped cream, you are sure to be proud of this decadently delicious pie.


Crust (makes 3, 9 inch double crust pie pastries)
5 1/4 cups all purpose flour
1 1/2 tsp salt
1 pound lard
1 egg
1 tbsp white vinegar
ice water

In a large bowl whisk together the flour and salt. Cut in the lard with a pastry cutter until pieces the size of oatmeal are formed. Don't over cut or the pastry will not be flaky.
In a 1 cup liquid measure whisk the egg and vinegar. Add ice water to create 1 cup. Using a fork or spoon pour a couple tbsp's of liquid over the flour mixture and toss to combine. Add more liquid until the dough is able to come together. I usually use it all. Form into a large ball. Cut in half, then into thirds. You will only need 2 out of the 6 sections. Tightly wrap the other 4 in plastic wrap and place in the freezer for up to 3 months. Wrap and place the remaining two in the fridge for at least 2 hours or up to 3 days.


Strawberry Rhubarb Pie
1, 9 inch double crust pie

2 1/2 cups quartered strawberries
3 1/2 cups rhubarb, cut into 1 inch pieces
3/4 cup granulated sugar
1 tsp vanilla extract
zest of one small orange
1/2 cup allpurpose flour
2 tbsp butter, cut into chunks
dough for double crust pie
1 egg

Pre-heat oven 425 degrees and place rack in the lower third of the oven.
In a large bowl toss together the strawberries, rhubarb, sugar, vanilla, orange zest and flour. Set aside.

Roll out dough for the bottom of the pastry. To know it's the right size, place your pie plate on top and make sure the circle is 2 inches wider around the edge. Transfer dough to pie plate and scrape in filling. Don't scrape in any excess liquids in the bottom of the bowl. Place butter chunks around the top of the pie. Whisk egg in a small bowl and brush the edges with a pastry brush. This is so the top crusts stick together.

Roll out remaining dough. It should be 1 inch wider than the pie plate. Transfer to rolling pin and top pie. Fold the overhang of the dough under the edge. Flute or crimp. Brush egg wash entirely over the pie and sprinkle with sugar if desired.

Bake in the oven for 20 minutes. Reduce oven temperature to 350 degrees. Continue baking for 40-50 minutes until the bottom and top is golden brown. Let cool to room temperature, about 5-6 hours. Serve with icecream or whipped cream if desired!

I hope you enjoy this pie! I know my dad and grandpa did!


Adapted From Canadian Living